
12 Easy DIY Plant Stand Ideas Anyone Can Build This Weekend
The best DIY plant stand ideas do not require a full workshop or a big budget. Most need only a saw, a drill, a handful of screws, and one free afternoon. What separates a sturdy stand from a wobbly one is simple planning: the right height, a top sized to the pot, and wood that suits the spot. These twelve DIY plant stand ideas cover everything from a ten-minute repurpose hack to a proper raised cedar planter, each with difficulty, build time, materials, and the measurements that make it work.
Before You Build: Tools, Safety, and Sizing Basics
Almost every stand below needs the same short tool kit: a tape measure, a pencil, a handsaw or miter saw, a drill, a sander or 120-grit sandpaper, a carpenter's square, and a level — plus wood glue and 1 1/4-inch and 2-inch wood screws.
- Measure the pot first, not last. The top or cradle should be about 1 inch wider than the pot's base, and the pot should sit at least 1 inch down inside any frame or lip so it cannot slide off.
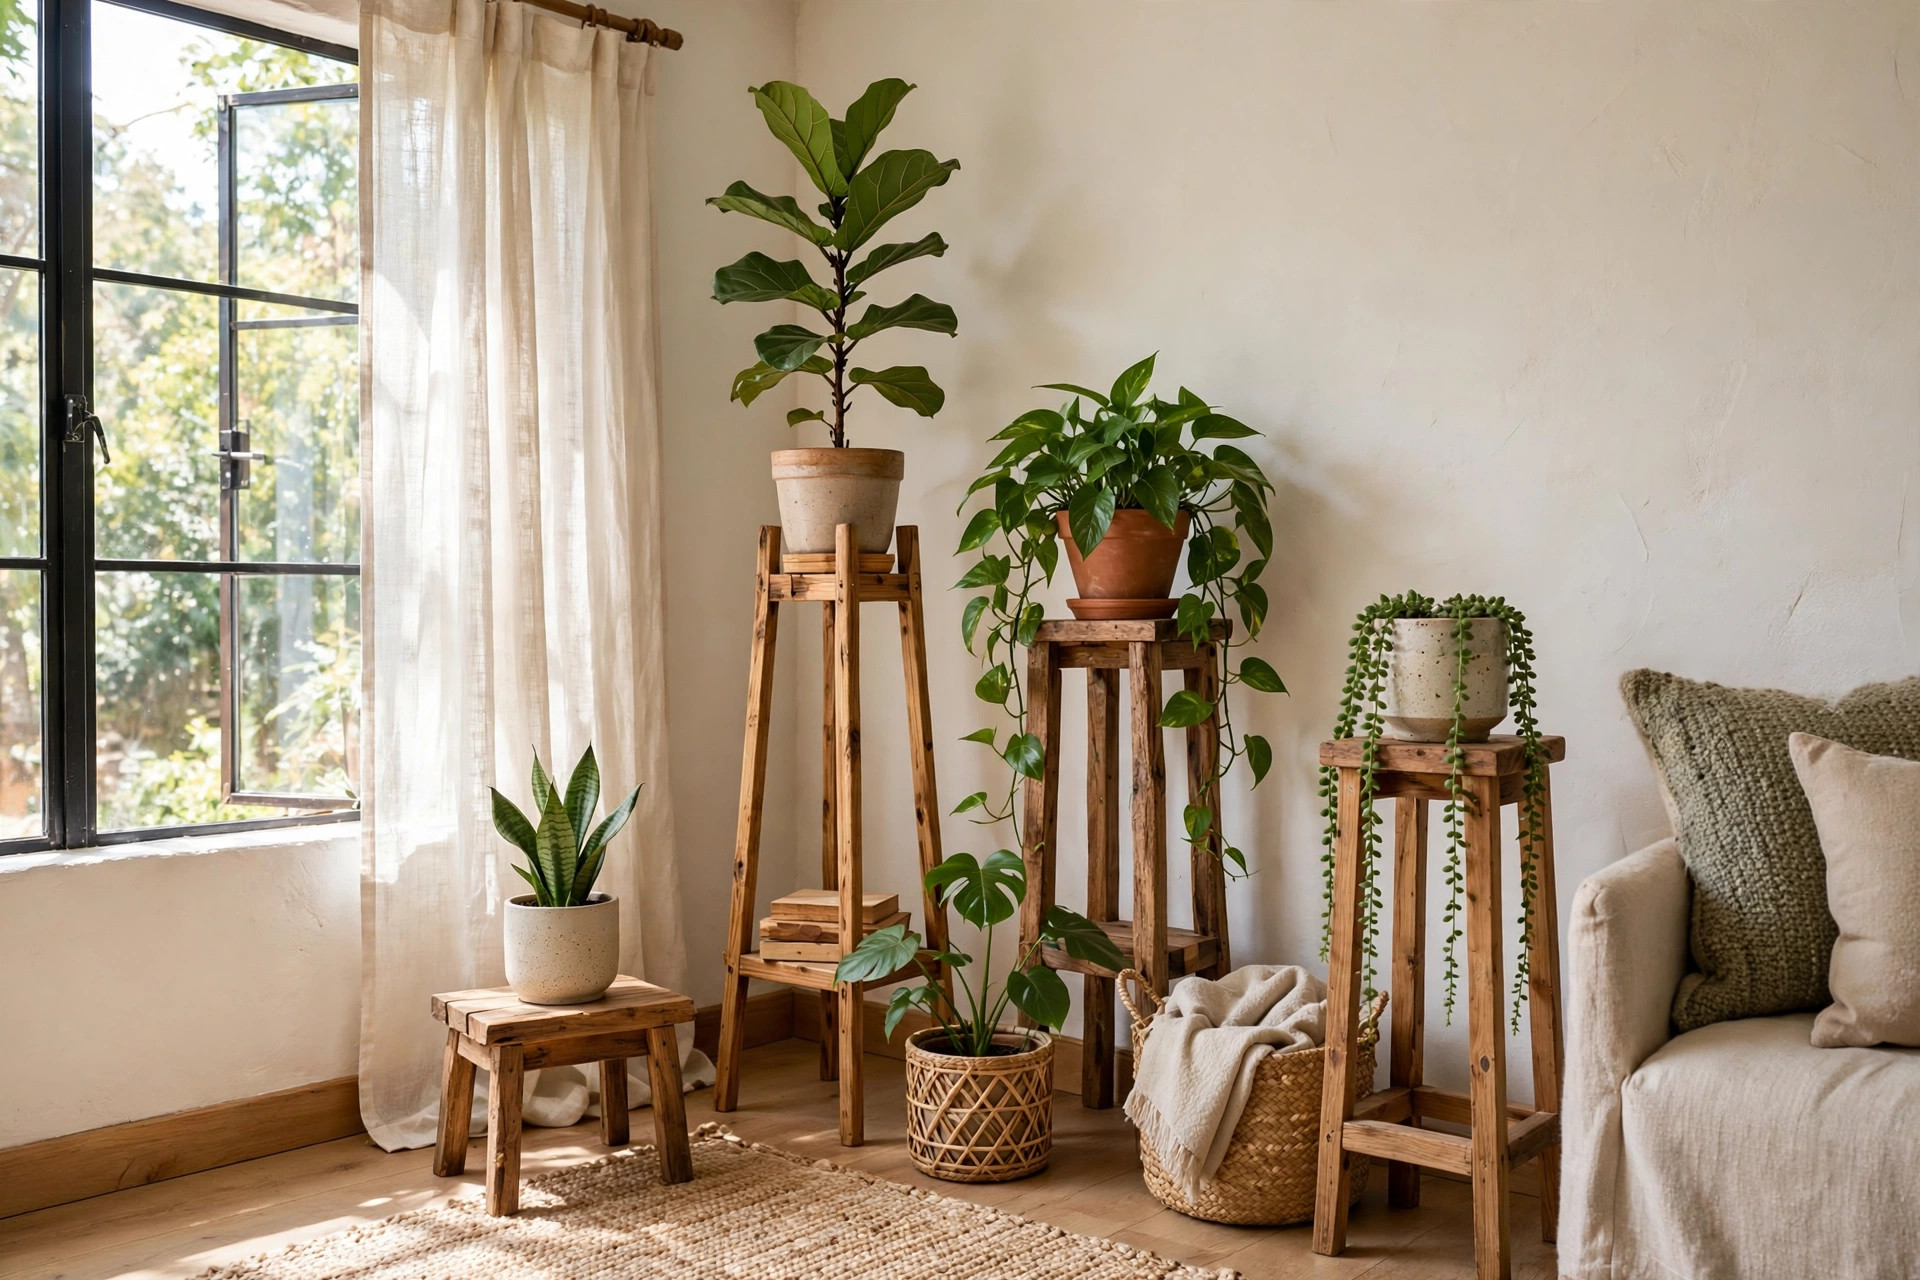
- Use the three useful heights: 12, 18, and 24 inches. A 12-inch stand suits a heavy 10 to 12-inch pot; 18 inches is the sweet spot for everyday 6 to 8-inch pots; a slim 24-inch stand lifts trailing plants and 4 to 6-inch pots to window light. Mixing the three heights creates a tiered display where every plant still gets light.
- Safety basics. Wear eye protection, clamp the board instead of holding it, pre-drill board ends so they do not split, and sand every edge a hand will touch. Test each finished stand with a firm sideways push before a plant goes on it.
If you are new to building, guides like Better Homes & Gardens' DIY plant stand ideas and the plans at Ana White's small raised planter stands show how far a simple screwed-together frame can go.
12 Easy DIY Plant Stand Ideas to Build This Weekend
1. The Mid-Century Cross-Leg Stand
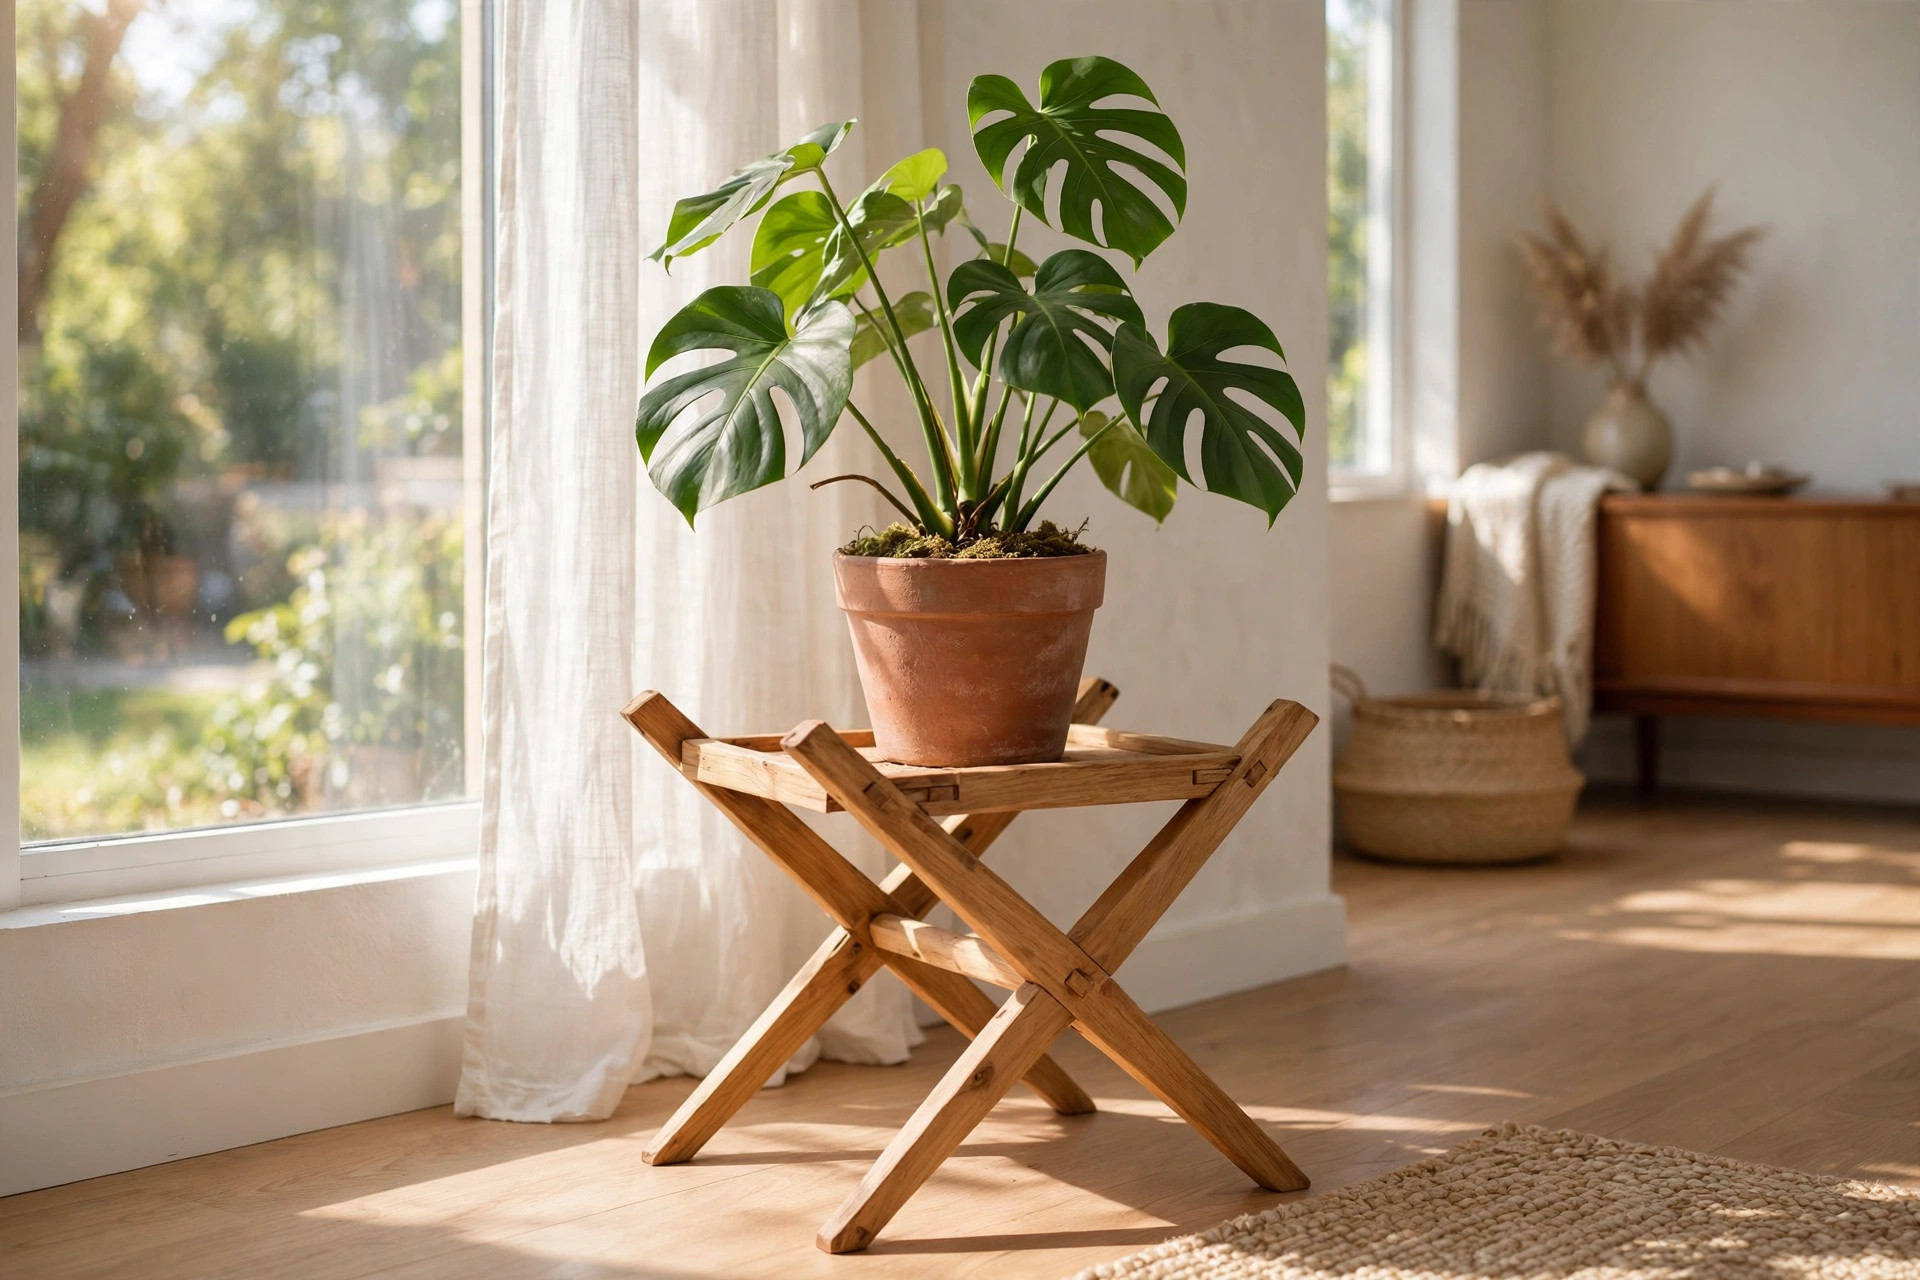
Difficulty: moderate. Time: about 2 hours. Materials: two 1x2 boards at 30 inches, one 1x2 board at 26 inches, wood glue, four 1 1/4-inch screws, optional angled leg tips.
Cut two X frames from the 30-inch boards, crossing them at the midpoint and fixing the crossing with glue and a screw. Join the frames with the 26-inch board across the top so the pot rests in the cradle between them. Build it 12 inches tall for a 10-inch pot, legs splayed about 14 inches apart at the floor for stability. This is the classic plant-shop look — perfect for a monstera or snake plant lifted just off the floor.
2. The Beginner's Four-Leg Stand
Difficulty: beginner. Time: 45 minutes. Materials: four 2x2 legs cut to 18 inches, four side rails cut to 9 inches, screws, glue.
Screw the rails between the legs to form a square frame 12 inches across, then add two cross slats on top. An 18-inch stand with a 12-inch top holds an 8-inch pot perfectly — the right first project if you have never built anything: every cut straight, every joint a simple butt joint. Round over the top edges with sandpaper so glazed pots do not chip.
3. The Tiered Ladder Stand
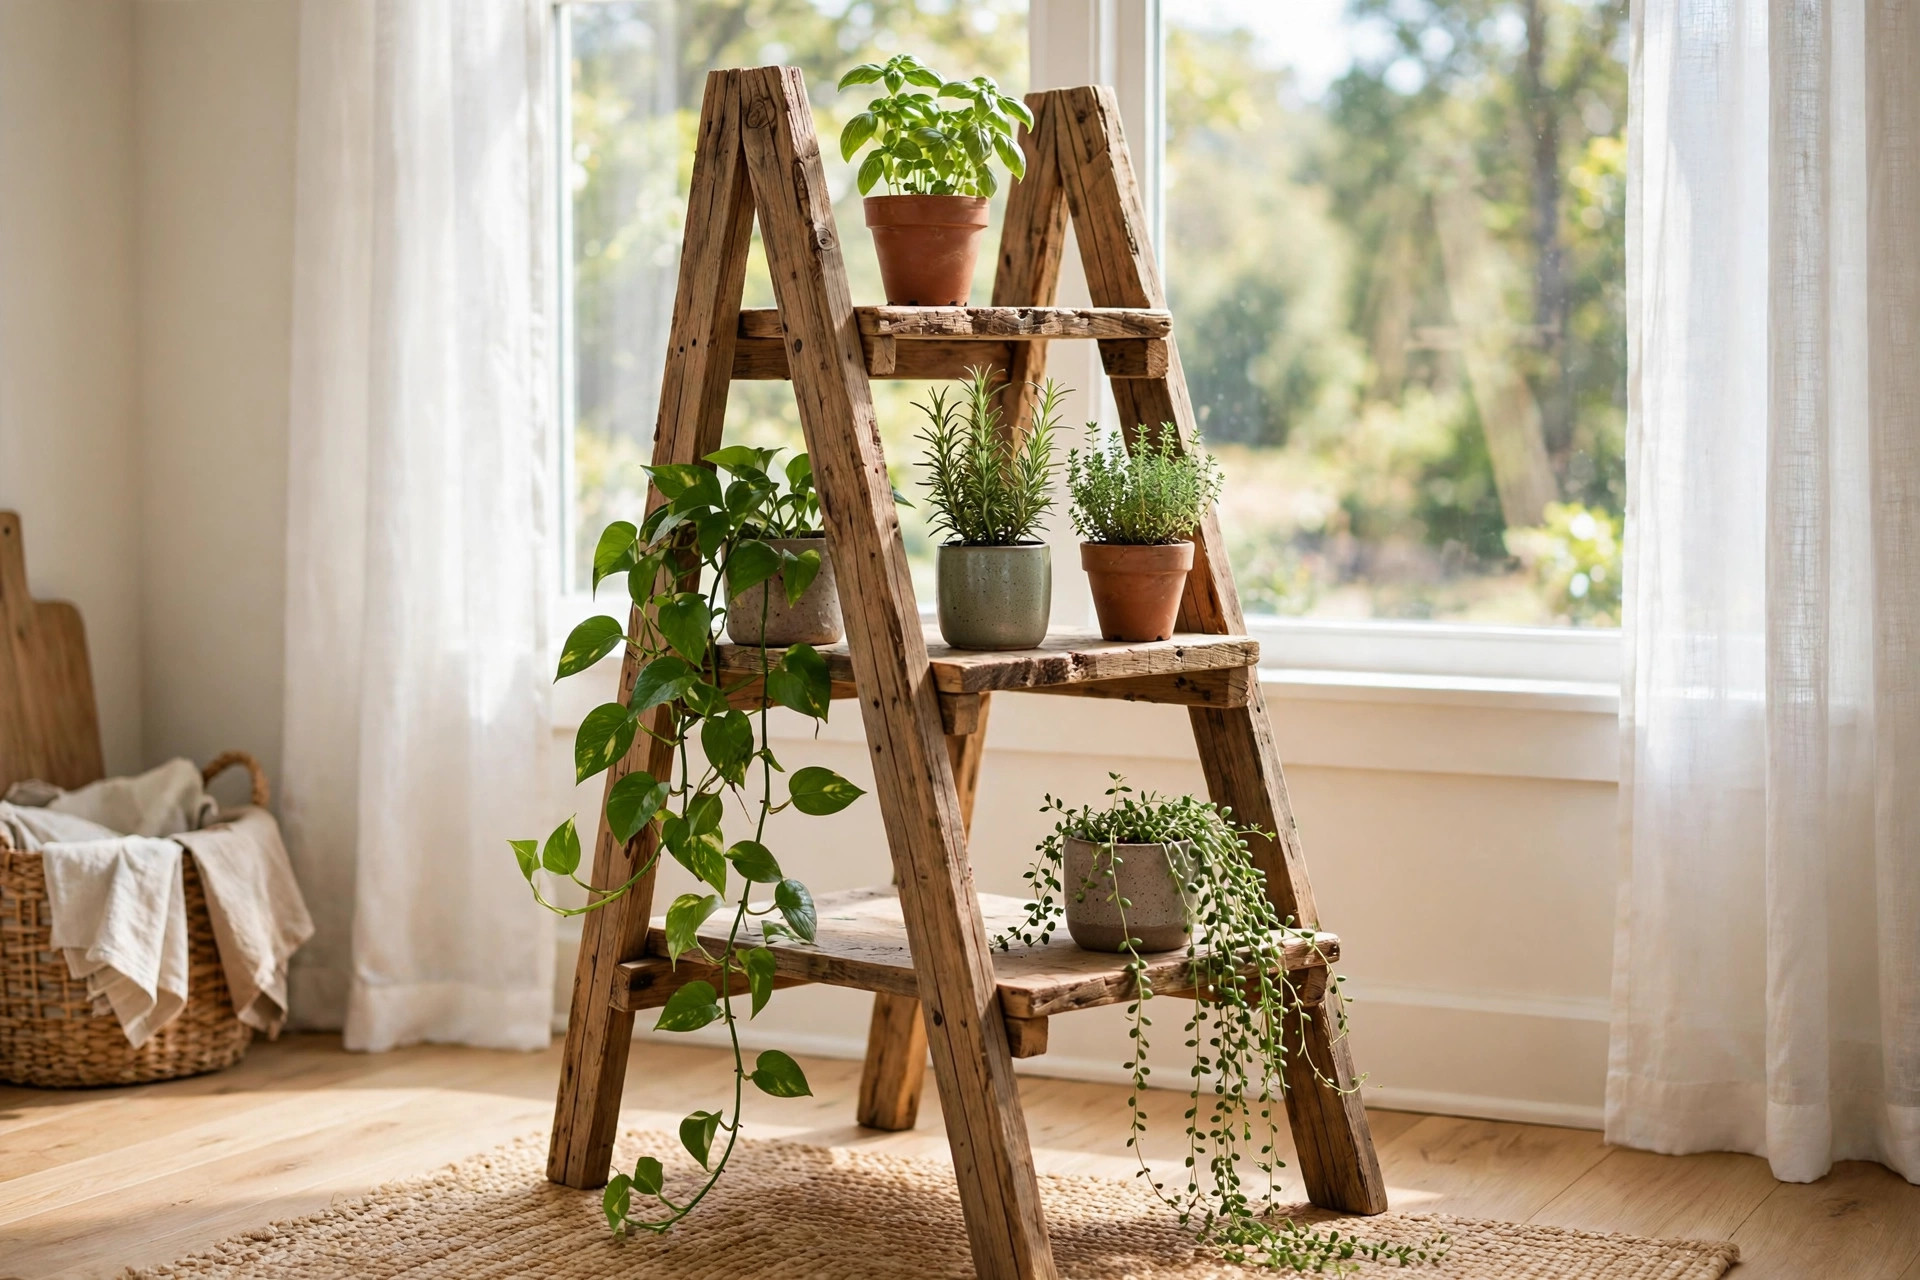
Difficulty: moderate. Time: 2 to 3 hours. Materials: two side rails at 48 inches, five shelves from 1x6 boards, screws, two hinges if you want it to fold.
Lean the rails against a wall or hinge them into an A-frame, then fix shelves at 12, 24, and 36 inches, each shelf about 10 inches deep. The bottom shelf takes 10-inch pots, the middle 8-inch pots, and the top 6-inch pots and trailing plants that can spill over the edge. One square foot of floor becomes three levels of growing space — the best design here for herb collections and small apartments.
4. The Wooden Crate Stack
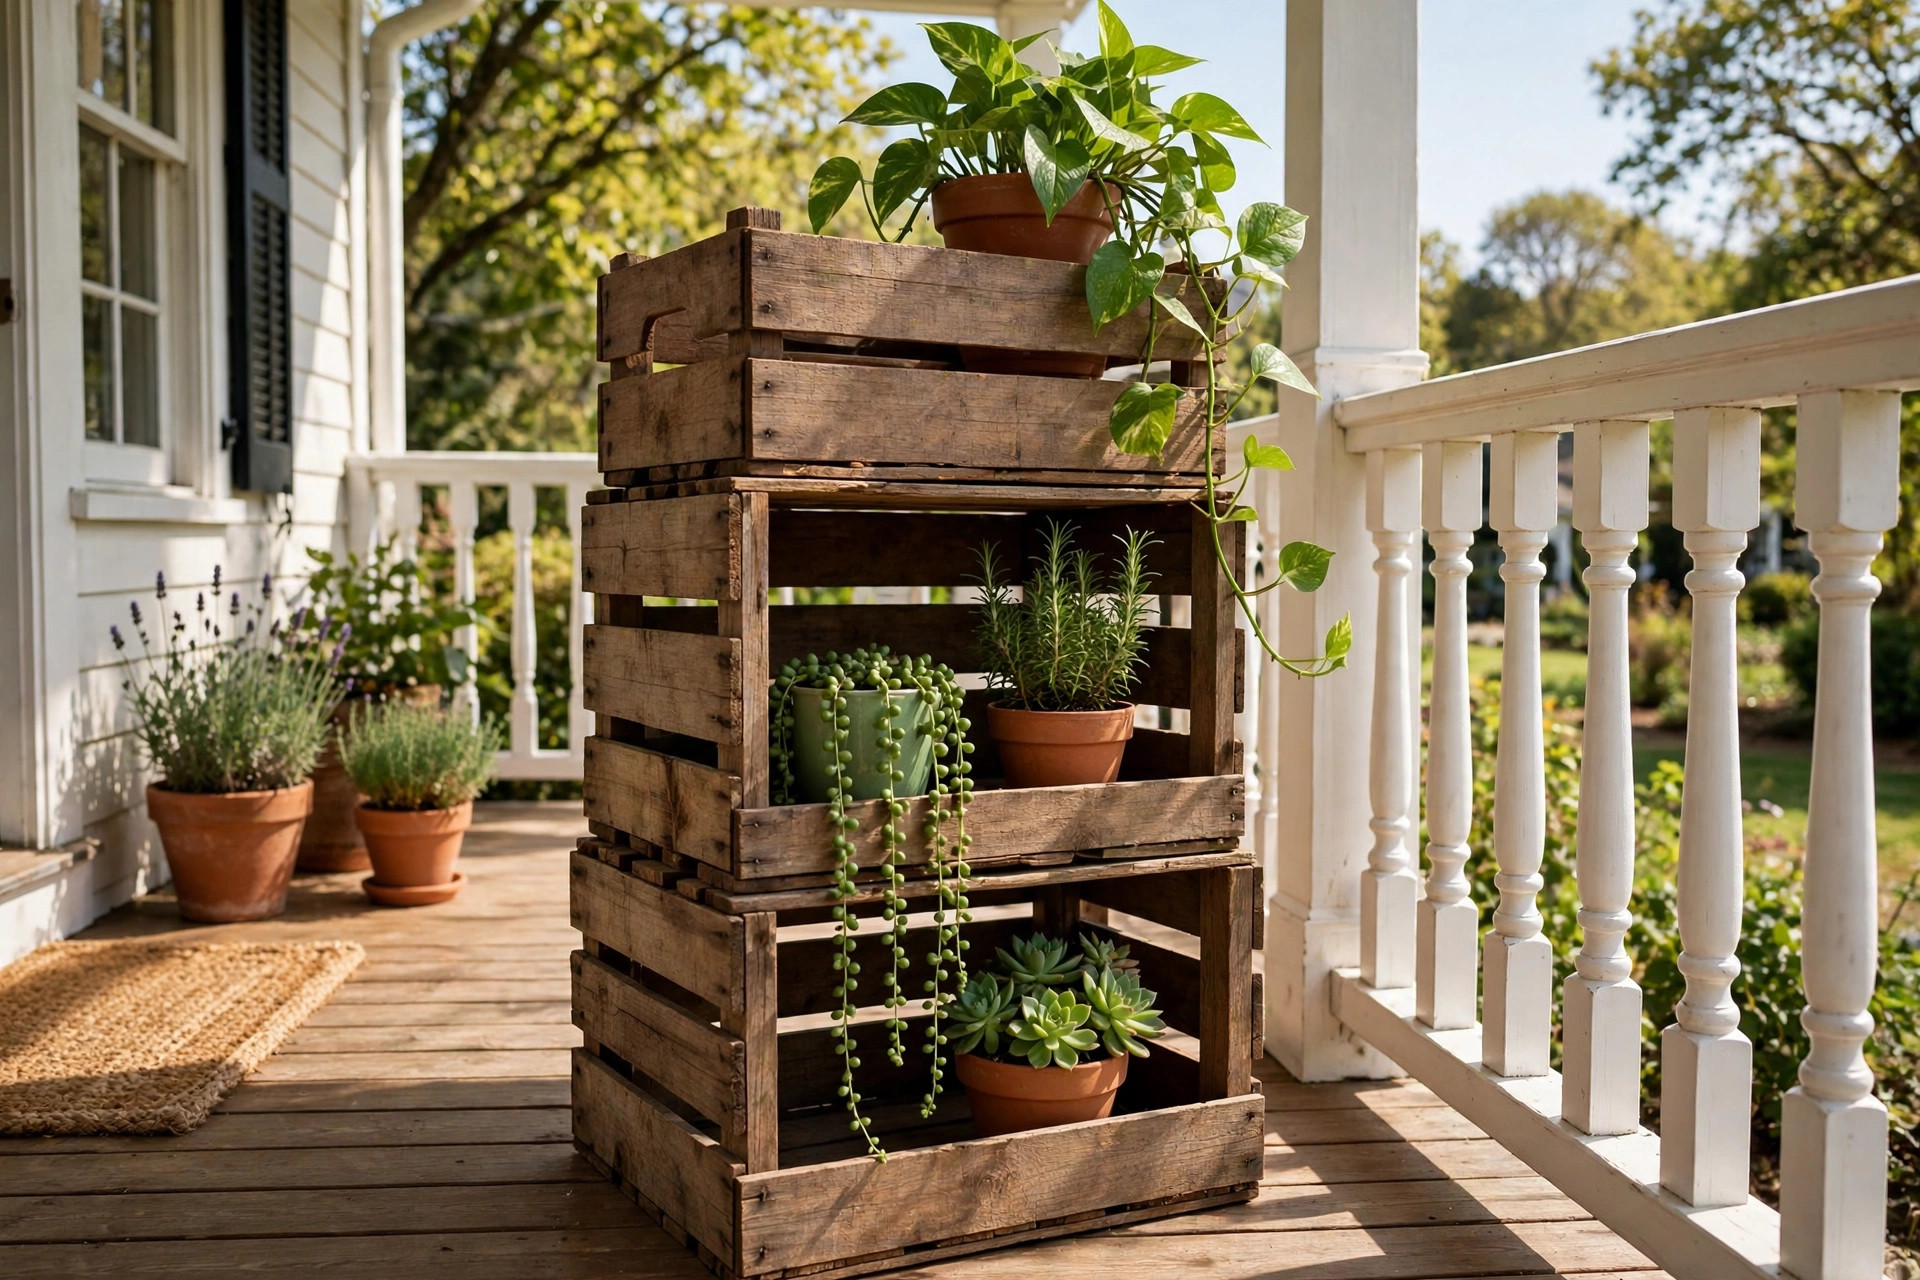
Difficulty: beginner. Time: 30 minutes. Materials: two or three wooden crates (about 18 x 12.5 x 9.5 inches), screws or strong glue, optional casters.
Stack two crates on their sides and screw them together where the frames touch; stand a third crate upright beside them for a taller level. Pots sit in the open faces; books and watering cans hide in the closed sections. Sand the slat edges well — crate wood is rough — and add casters if the stack lives in front of a window you open often. It is the fastest route to a tiered display with storage built in.
5. The Tomato Cage Hack
Difficulty: beginner. Time: 10 minutes. Materials: one cone-shaped wire tomato cage (usually 33 or 42 inches tall), wire cutters, spray paint if you want a color.
Flip the cage upside down, snip off the ground spikes level, and set a pot into the top ring. The 33-inch cage suits 8 to 10-inch pots; paint it matte black or brass and it reads as a minimalist metal stand for almost nothing. File cut wire ends smooth, and if the pot rocks, bend the top ring slightly smaller until it grips.
6. The Old Stool, Reborn
Difficulty: beginner. Time: 20 minutes plus paint drying time. Materials: a thrifted wooden stool, sandpaper, paint or stain, a cork pad or felt.
Any sturdy stool with a seat 10 to 14 inches across is already a plant stand — it just needs a clean-up. Sand off flaking finish, repaint it in a color your room is missing, and stick a cork pad on the seat so pots do not scratch or slide. A 24-inch kitchen stool lifts a plant to sofa-arm height; a short 18 to 19-inch piano stool works beside a reading chair.
7. The Vintage Ladder Display
Difficulty: easy. Time: 15 minutes. Materials: an old wooden step ladder, planks of 1x8 board cut to the ladder's width, optional sandpaper and clear sealer.
Open a worn step ladder, lay a plank across each pair of steps, and you have instant graduated shelves. Steps sit 9 to 12 inches apart in height, so small pots climb the ladder while one large pot anchors the floor beside it. Keep the load modest — vintage ladders were built for a person standing still, not shelves of wet soil — and reserve it for 4 to 8-inch pots.
8. The Raised Cedar Planter Stand
Difficulty: moderate. Time: about 3 hours. Materials: cedar 2x2 legs at 24 inches, cedar 1x4 side boards, exterior screws, drainage gravel.
Build a box frame about 24 inches long and 12 inches wide, raised 18 to 24 inches, with base slats spaced half an inch apart for drainage. Cedar shrugs off rain that would rot pine in a season — this is the porch and balcony herb stand. Line the inside with landscape fabric, add an inch of gravel, and waist-height tending means no kneeling to harvest.
9. The Hairpin-Leg Stand
Difficulty: easy. Time: 30 minutes. Materials: a round or square wood board 12 to 14 inches across and at least 3/4 inch thick, three or four hairpin legs (12 or 16 inches), short screws.
Screw the legs to the underside of the board, keeping them 1 inch in from the edge, and the project is done. Three legs never wobble on uneven floors; four legs carry heavier pots, up to a 12-inch ceramic planter. It is the quickest route to a clean, modern stand — and a good use for a butcher-block offcut.
10. The Concrete Block and Board Stand
Difficulty: beginner. Time: 20 minutes. Materials: four standard concrete blocks (16 x 8 x 8 inches), two boards at 36 inches long, outdoor paint if you want color.
Stand two blocks at each end and lay the boards across them for a low stand 8 inches off the ground; stack the blocks two high for a 16-inch version. It holds several large pots, survives any weather, and comes apart in minutes. Paint the blocks one color and it looks deliberate instead of like a building site.
11. The Tree Stump Stand
Difficulty: easy. Time: 1 hour, mostly sanding. Materials: a log section 10 to 14 inches in diameter, cut 12 to 18 inches tall, 80 and 120-grit sandpaper, clear matte sealer.
Level both ends as carefully as you can, sand the top smooth, and seal the whole piece so bark dust and moisture stay put. A stump stand brings real weight and texture next to a sofa or fireplace and holds one hero plant — a fiddle-leaf fig in a 10-inch pot is the classic pairing. Keep it indoors or under cover — rain splits even sealed wood.
12. The Rolling Plant Caddy
Difficulty: easy. Time: 40 minutes. Materials: a square board 14 x 14 inches (or a circle 14 inches across), four swivel casters rated at 50 pounds or more each, screws, optional rope handle.
Fit the casters near each corner, flip it over, and your heaviest plant can now follow the sun and roll aside for cleaning. Only 3 inches of height, but for a 12-inch pot that would otherwise never move, it is the most useful stand on this list. Choose casters with at least one locking wheel so the plant stays put on smooth floors. Enjoyed building at this scale? Our DIY bookshelf makeover ideas and DIY coat rack ideas use the same tools, and everything lives in our DIY Projects archive.
Finishing and Weatherproofing Your Stand
An indoor stand only needs sanding to 120 grit and a coat or two of paint, stain, or clear polyurethane. For porch and balcony use, treat the finish as part of the structure: exterior-grade paint or spar urethane, the end grain coated twice (it drinks water first), and feet or pads so the legs never sit in a puddle. Cedar and pressure-treated wood can go out with just a clear water-repellent sealer, renewed each spring. Whatever the finish, put a saucer or cork mat under every pot — most stand damage comes from watering overflow on top, not rain.
Stand Mistakes That Cost You a Plant
The most common is a top that is too small — a pot overhanging its stand will eventually get knocked off. The second is height greed: a 24-inch stand holding a heavy 12-inch pot is top-heavy, so keep big pots at 12 to 18 inches and let the tall stands carry the small ones. Third is skipping the wobble test until a full watering can is in hand. Fix the sizing first, and most DIY plant stand ideas turn out sturdier than the flat-packed stands they replace.
Start with the crate stack or the four-leg stand this weekend, and build at two heights instead of one. Plants sitting at 12, 18, and 24 inches look collected and deliberate — and you built every inch of it yourself.
Comments
Post a Comment