
12 Easy DIY Pegboard Organization Ideas for Every Room
If you have one wall that could work harder, a pegboard is the fastest way to make it happen. These DIY pegboard organization ideas take a plain panel of holes and turn it into storage that fits your actual life — not just the garage. One board can hold pans in the kitchen, keys by the door, craft supplies over a desk, and tools where you can finally find them.
The best part is how changeable it is. Hooks move in seconds. Baskets lift off. Nothing needs a new hole in the wall when your needs change next month.
You do not need advanced skills to get a good result. If you like the approachable projects in our guide to easy DIY home decor projects for beginners on a budget, this is the same level: measure carefully, mount it securely, and then have fun arranging it. Start with one board, one room, and the items you reach for every day.
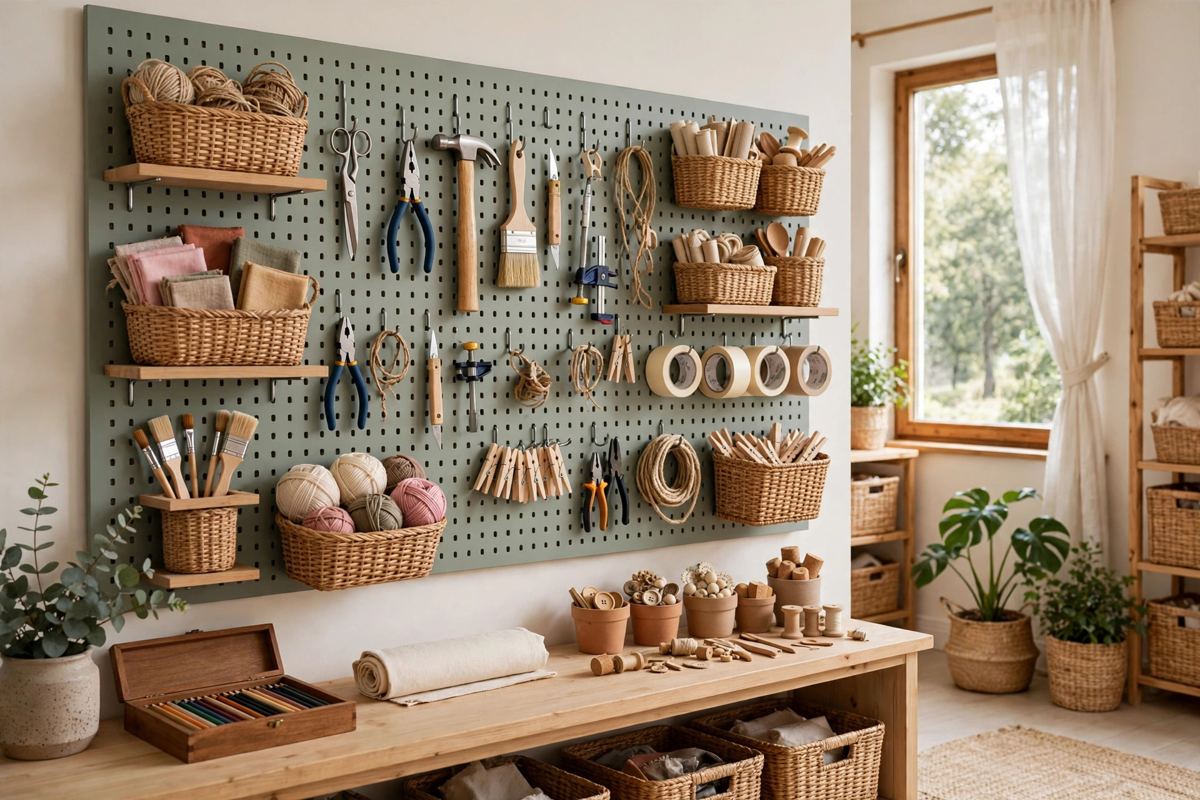
Before You Hang: Sizes, Spacers, and a Simple Install That Actually Holds
Most pegboard is hardboard or MDF with holes spaced 1 inch apart, center to center. That standard spacing matters because almost every hook, basket, and shelf is designed to fit it. If the spacing is not 1 inch, standard accessories may wobble or not fit at all.
Panels usually come in two useful sizes. A 2 x 4-foot panel is the friendly starter size — big enough for a desk, entryway, or kitchen wall, and easy to carry and cut. A full 4 x 8-foot sheet covers a garage wall or a large craft area, and most stores will cut it down for you. Buy the size closest to your wall and trim once, rather than piecing together small offcuts.
Materials you will need
- Pegboard panel, cut to size
- Furring strips or 1 x 2 spacers for the back
- Screws long enough to reach studs, plus drywall anchors where there is no stud
- A level, tape measure, pencil, and drill
- Sandpaper, paint or sealer, and optional trim to frame the edges
- A starter mix of hooks, baskets, cups, and small shelves
That gap behind the board is the step beginners miss. Hooks need room to drop in behind the panel, so a pegboard screwed flat to drywall will not work. Mount furring strips or spacers on the wall first — about half an inch to three-quarters of an inch of clearance is enough — then screw the board into the strips and, wherever possible, into wall studs. For heavy loads like cast iron or power tools, studs or proper anchors are not optional.
Basic install, step by step
- Measure the wall and mark studs, outlets, and the height you want. Daily items should land at eye level.
- Cut the panel to size, then sand the edges and hole rims so paint goes on smoothly.
- Paint before hanging if you want color. Two light coats, fully dry, look far better than one thick coat.
- Fix the spacers level on the wall, check with a level again, then secure the board through the spacers into studs or anchors.
- Frame the edges with thin trim if you like. It hides raw edges and makes a utility board look built-in.
For more layout inspiration before you drill, browse these roundups of pegboard organization ideas for different rooms and pegboard wall ideas for every room — notice how the best examples zone the board instead of filling every hole.
Zoning is simple: group by task, not by object type. Keep daily items at eye level, occasional items higher, and heavy items low where they are safe to lift. Leave some empty holes — breathing room separates a calm board from visual clutter.
12 Easy DIY Pegboard Organization Ideas for Every Room
1. Kitchen: Pans, Lids, and the Heavy Workhorses
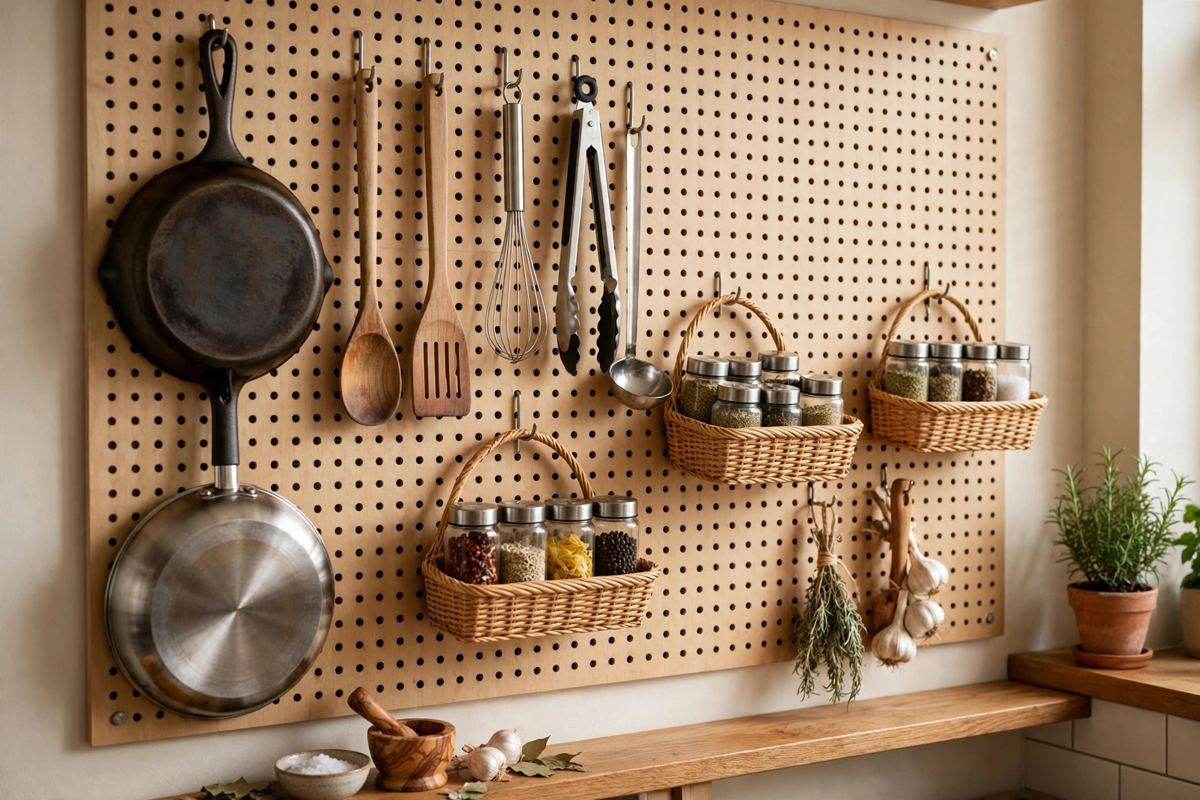
Hang your most-used pans on sturdy J-hooks in a single row, heaviest in the middle over a stud. Lids slot neatly into a dowel rail or a shallow basket beside them. This frees a whole cabinet for food storage and ends the stacked-pan crash every time you cook. Keep only the pans you use weekly here — the board is prime space, not overflow storage.
2. Kitchen: Utensils and Measuring Tools at Arm's Reach
Beside the stove or prep counter, a narrow board holds spatulas, tongs, ladles, and measuring cups on small hooks. Everything is visible, washable, and back in place in seconds. Add a small shelf for oil, salt, and a timer. If you cook daily, this one zone will save you more drawer digging than any gadget you could buy.
3. Entryway: Keys, Bags, and Out-the-Door Essentials
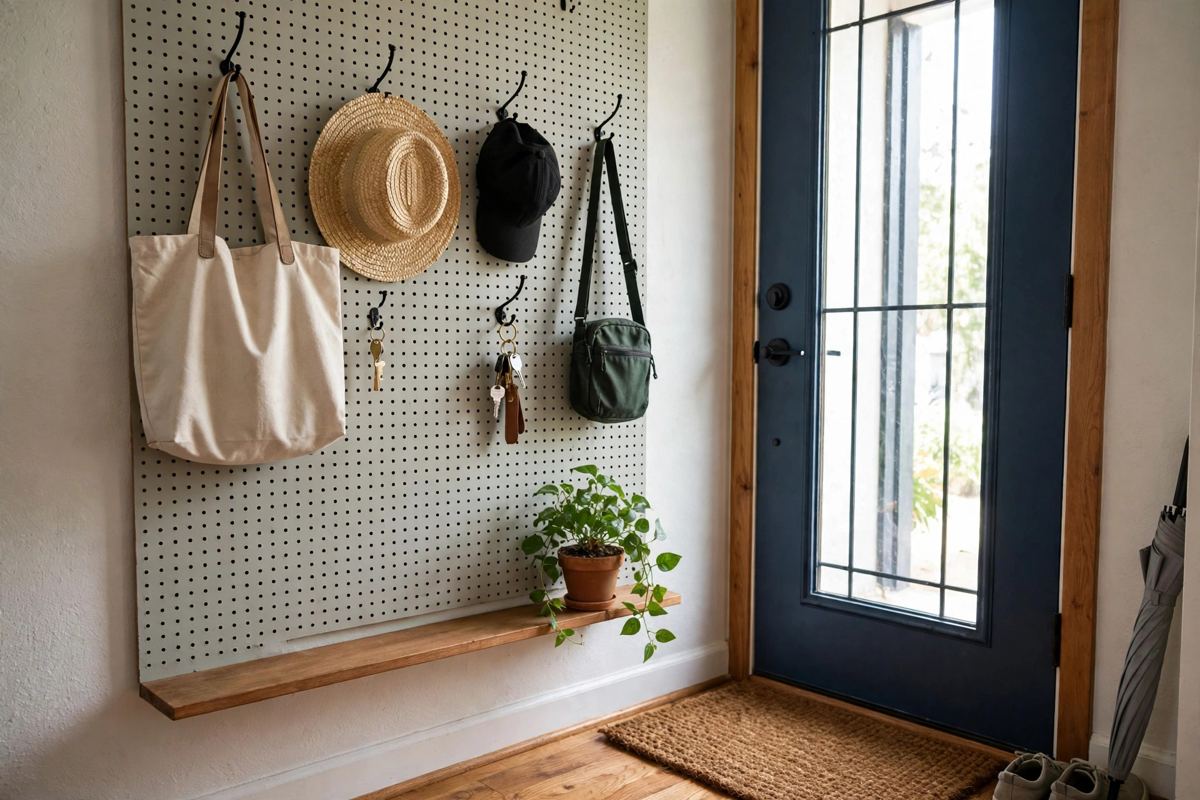
Mount a 2 x 4-foot board by the front door and give every person a row: hooks for keys and bags, a basket for mail and sunglasses, and a small shelf for a wallet or hand cream. Umbrellas hang from a long hook at the side. When the system lives where you actually walk in, things stop landing on the floor and chairs.
4. Home Office: Desk Supplies in Cups and Baskets
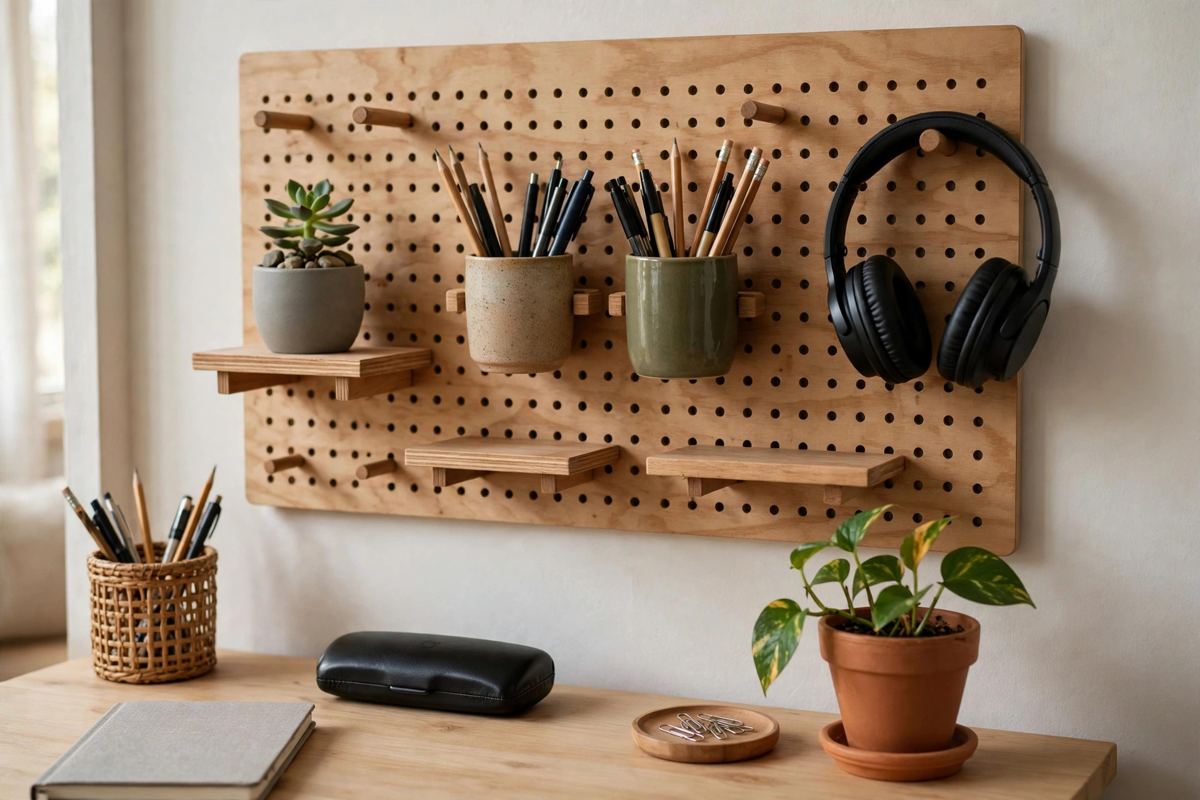
Over a desk, cups hold pens, scissors, and chargers, while wire baskets take notebooks and mail that needs action. A tiny shelf lifts a speaker or plant off the work surface. Your desk stays clear for a laptop and a notebook — nothing else has to live there. Pair this setup with the storage in our easy DIY floating shelf ideas if you need room for books above the board too.
5. Craft Corner: Supplies You Can Actually See
Craft supplies disappear in boxes and multiply in drawers. On a pegboard, ribbon spools thread onto a dowel, scissors hang on hooks, and clear cups sort beads, buttons, and markers by color. Add a basket for the current project only. Visible supplies get used; hidden supplies get bought twice.
6. Bedroom: A Headboard and Nightstand Alternative
In a small bedroom, a painted pegboard behind the bed works as both headboard and nightstand. Small shelves hold a phone, book, and glasses; a clip light mounts at reading height; a basket takes tissues and a water bottle. It costs far less than furniture and fits awkward narrow rooms.
7. Bathroom: Small Items, Off the Counter
Bathroom counters drown in small things. A water-sealed pegboard — paint it well or use a PVC panel — holds hair tools in heat-safe cups, brushes on hooks, and skincare on a narrow shelf. Keep daily items at eye level and backups higher up. Everything dries faster with air around it, and wiping the counter takes ten seconds when nothing lives on it.
8. Laundry Room: Cleaning Tools, Sorted and Dry
Brooms, mops, and dustpans lean in corners and fall over. Long hooks on a laundry-room pegboard hold them upright and off the floor, with a basket below for cloths, stain remover, and lint rollers. Hang spray bottles by their triggers on J-hooks. The floor stays clear for baskets and hampers, and damp tools dry properly instead of smelling musty in a cupboard.
9. Living Room: A Living Plant Pegwall
A pegboard makes a surprisingly good plant wall. Small shelves and ring holders carry trailing pothos, herbs, and cuttings in jars, and you can shift plants toward the light as seasons change. Use a soft green or warm white board so the foliage is the star. Start with five or six plants and leave space.
10. Kids' Room: Art Display That Can Change Weekly
Give kids a board at their height with clips for artwork, hooks for hats and bags, and baskets for crayons and current treasures. The rule is simple: if it fits on the board, it can stay out; if not, something rotates off. Children can reach, choose, and tidy it themselves.
11. Closet: Jewelry and Accessories on Dowels
Necklaces tangle in every jewelry box ever made. On a small closet pegboard, short dowels hold necklaces and bracelets in a single visible layer, hooks take belts and scarves, and a tiny shelf holds watches and perfume. Getting dressed gets faster because you can see every option at once. Paint the board the same color as the closet wall for a calm, boutique feel.
12. Garage: Tools With Outlines So Everything Goes Back
The classic garage board still earns its place. Hang hand tools in the order you use them, heaviest low and over studs, then trace each tool's outline with a marker or paint pen. Anyone can see what is missing and where it returns. Add baskets for tape, gloves, and safety glasses, and one shelf for the drill.
Quick Picks: A Starter Kit by Budget
You do not need a huge kit to start well. Prices vary by store, but these honest ranges cover most home centers:
- Under $40 starter: One 2 x 4-foot hardboard panel (about $15–$25), furring strips and screws (about $5–$8), and a basic 30–50 piece hook assortment (about $10–$15). Enough for an entryway, desk, or utensil wall.
- Around $75 mid-range: A larger or pre-painted panel, a mixed kit with baskets, cups, and two small shelves, plus trim to frame the edges and a better anchor set for heavy items.
- Around $120 full-room: A 4 x 8-foot sheet cut to fit, two accessory kits, dowels and shelves, and paint in a custom color. This covers a garage wall or a full craft corner in one go.
Buy hooks for your first layout only, live with it for two weeks, then add what you actually missed. Most people overbuy baskets and underbuy simple J-hooks.
Mistakes That Make a Pegboard Look Messy (and Fail Fast)
- Skipping the spacers. No gap behind the board means hooks cannot seat properly. This is the number one reason pegboards disappoint.
- Mounting only into drywall. Light hooks are fine on anchors; pans and tools need studs. A board that pulls out once will never be trusted again.
- Filling every hole. Crowded boards look chaotic and are hard to use. Zone by task and leave empty space on purpose.
- Putting daily items too high. If you need a stool for your keys or spatula, the layout is wrong. Eye level is for everyday things.
- Mixing too many container styles. Pick one or two basket and cup finishes and repeat them. Matching containers calm the whole board down instantly.
- Never editing it. A pegboard is a living system. Once a season, pull everything off, remove what you stopped using, and re-zone. It takes twenty minutes and makes the board feel new.
A pegboard will not organize your home by itself — but it makes staying organized the easiest option, which is the only system that lasts. Pick one wall, hang one board properly, and live with it for a week. Then browse more ideas in our DIY Projects collection and choose the wall that bothers you most.


Comments
Post a Comment